上传相关:
默认上传文件大小 1m
413 Request Entity Too Large 需要将其修改至合适大小 client_max_body_size 200m ;
windows 操作命令
powershell
启动
start nginx
停止
nginx -s stop

重载
nginx  -s  reload
keepalived
| 机器 | 安装软件 | |
|---|---|---|
| 192.168,83.128 | nginx | keepalived |
| 192.168,83.129 | nginx | keepalived |
| 虚拟ip | ||
| 192.168.83.130 |
安装 keepalived
yum install -y keepalived
安装nginx
shell
yum -y install make zlib zlib-devel gcc-c++ libtool openssl openssl-devel

tar -zxvf nginx-1.12.2.tar.gz
cd nginx-1.12.2
./configure
make && make install
# 进入 /usr/local/nginx/sbin/nginx 启动服务
# 相关命令
./nginx -v # 查看 nginx verison
./nginx # 启动nginx
./nginx -s stop # 停止nginx
./nginx -s reload # 重新加载

ln -s  /usr/local/nginx/sbin/nginx   /usr/local/bin/nginx

##安装额外的模块
./configure --with-http_stub_status_module
## make  make  install

-------------
###  关闭版本提示
nginx  关闭版本提示
 http{
 # 客户端上传文件控制大小
client_max_body_size 200m   ;
关闭版本提示
server_tokens off;

 }
配置 keepalived
shell
vi /etc/keepalived/keepalived.conf
! Configuration File for keepalived

 # 主机
global_defs {
   notification_email {
     acassen@firewall.loc
     failover@firewall.loc
     sysadmin@firewall.loc
   }
   notification_email_from Alexandre.Cassen@firewall.loc
   smtp_server 192.168.200.1
   smtp_connect_timeout 30
   router_id LVS_DEVEL
   vrrp_skip_check_adv_addr

   vrrp_garp_interval 0
   vrrp_gna_interval 0
}

vrrp_instance VI_1 {
#  主机  MASTER  备机 BACKUP
    state MASTER
    # 网卡
    interface ens33
    # 主备机保持一致
    virtual_router_id 60
    priority 100
    advert_int 1
    authentication {
        auth_type PASS
        auth_pass 1111
    }
    virtual_ipaddress {
      # 虚拟ip
        192.168.83.130/24
    }
}

-------------------------------------
备机

! Configuration File for keepalived

global_defs {
   notification_email {
     acassen@firewall.loc
     failover@firewall.loc
     sysadmin@firewall.loc
   }
   notification_email_from Alexandre.Cassen@firewall.loc
   smtp_server 192.168.200.1
   smtp_connect_timeout 30
   router_id LVS_DEVEL
   vrrp_skip_check_adv_addr

   vrrp_garp_interval 0
   vrrp_gna_interval 0
}

vrrp_instance VI_1 {
    state BACKUP
    interface ens33
    virtual_router_id 60
    #  备机 需要小于 主机的
    priority 90
    advert_int 1
    authentication {
        auth_type PASS
        auth_pass 1111
    }
    virtual_ipaddress {
        192.168.83.130/24
    }
}

---------------------
# 启动主机
systemctl start keepalived
# 查看日志
tail -f -n 1000 /var/log/messages
#  查看是否绑定了虚拟ip
ip addr |  grep  192.168.83.130
-----
# 停止  按照进程名称杀死进程   最有效果  用来修改配置文件
pkill  keepalived
#  主机停止后 虚拟ip 会漂移到 备机  当主机恢复后自动漂移到主机
#  重启网络  之后 再重启 keepalived,否则失败
 systemctl restart network.service
open registy https
https://www.cnblogs.com/liuxm2017/p/10921512.htmlhttps://blog.csdn.net/qq_27575627/article/details/126724230 letsencrypt 实现 https https://letsencrypt.org/zh-cn/
shell
# 安装  certbot
# 执行命令  -w  root  -d  域名      -m  邮箱
 certbot certonly --webroot -w /opt/projects/XXXXX/  -d mt.xxx.cn -m XXX@qq.com
配置文件
shell
server {
    listen 80;
    server_name www.xxx.com;
    location / {
        try_files $uri $uri/ /index.html;
        root /opt/xxx/xxx;
        index index.html index.htm;
    }
}


server {
    listen 80;
    server_name www.xxx.com;
    rewrite  ^/(.*)$  https://www.xxx.com/$1 permanent;
}

server {
    listen 443 ssl;
    server_name www.xxx.com;

    ssl_prefer_server_ciphers on;
    ssl_ciphers HIGH:!ADH:!MD5:!aNULL:!eNULL:!MEDIUM:!LOW:!EXP:!kEDH;
    ssl_protocols TLSv1.2 TLSv1.1 TLSv1;
    ssl_session_timeout 1d;
    ssl_session_cache shared:SSL:50m;
    ssl_stapling on;
    ssl_stapling_verify on;
    add_header Strict-Transport-Security max-age=15768000;

    ssl_certificate /etc/letsencrypt/live/www.xxx.com/fullchain.pem;
    ssl_certificate_key /etc/letsencrypt/live/www.xxx.com/privkey.pem;


    location / {
        try_files $uri $uri/ /index.html;
        root /opt/xxx/xxx;
        index index.html index.htm;
    }

        error_page   500 502 503 504  /50x.html;
        location = /50x.html {
                root   html;
        }
}

#
# 1. 打开定时任务配置
 crontab -e
# 2. 增加定时刷新的配置
30 3 * */2 * /usr/bin/certbot renew --quiet >> /var/log/cerbot.log

注意 : 反向代理 内部必须是http
日志配置:
https://blog.csdn.net/qq_34399969/article/details/120308446https://blog.csdn.net/Yue_zuozuo/article/details/136044779
nginx
http{
	log_format  main  '$year'
	                   '-$month'
					   '-$day $hour:$minutes:$seconds;'
					   '$remote_user;'
					   '$remote_addr;'
					   '$request_uri;'
                      '$status;'
                      '$http_x_forwarded_for;'
					  '$http_host;'
					  '$http_referer;'
					  '$body_bytes_sent;'
					  '$http_user_agent;'
					  '$request';
  access_log  logs/access.log  main;
  error_log   logs/error.log  error;
  server{

		if ($time_iso8601 ~ "^(\d{4})-(\d{2})-(\d{2})T(\d{2}):(\d{2}):(\d{2})") {
			set $year $1;
			set $month $2;
			set $day $3;
			set $hour $4;
			set $minutes $5;
			set $seconds $6;
		}
    #access_log  logs/access.log  main;
    location / {
      #  请求头携带 请求ip
			proxy_set_header real-host $host;
			proxy_set_header real-ip $remote_addr;
			proxy_pass http://localhost:8081/;
    }

  }
}
搭建文件服务器
https://cloud.tencent.com/developer/article/1498209
nginx
 server {
        listen       80;
        server_name  localhost;
        root /usr/local/static/;
        #charset koi8-r;

        #access_log  logs/host.access.log  main;

        location / {
            autoindex on;             #开启索引功能
            autoindex_exact_size off; # 关闭计算文件确切大小(单位bytes),只显示大概大小(单位kb、mb、gb)
            autoindex_localtime on;   # 显示本机时间而非 GMT 时间
            charset utf-8; # 避免中文乱码
            #root   html;
            #index  index.html index.htm;
        }
}
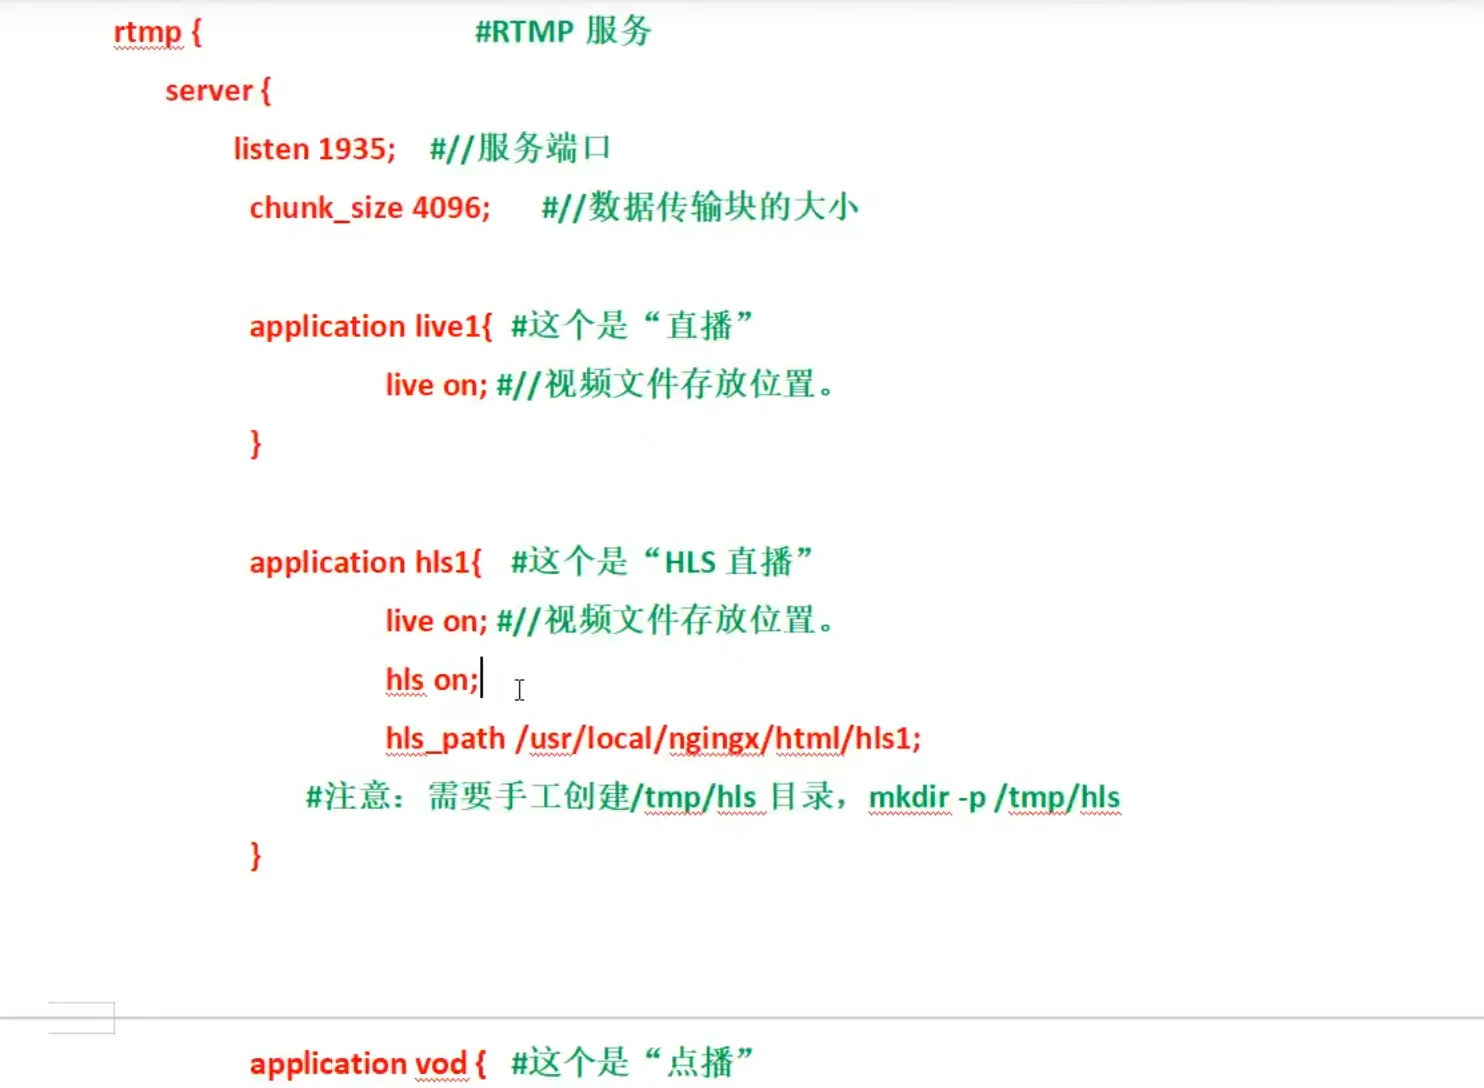
nginx rtmp 实现 视频推流拉流
https://www.cnblogs.com/ydqblogs/p/17970146 建议使用 openresty openresty 自带了很多插件 需要 nginx-rtmp-module


nginx 配置
sh
rtmp{
  server {
	listen 1935;
	chunk_size 4096;
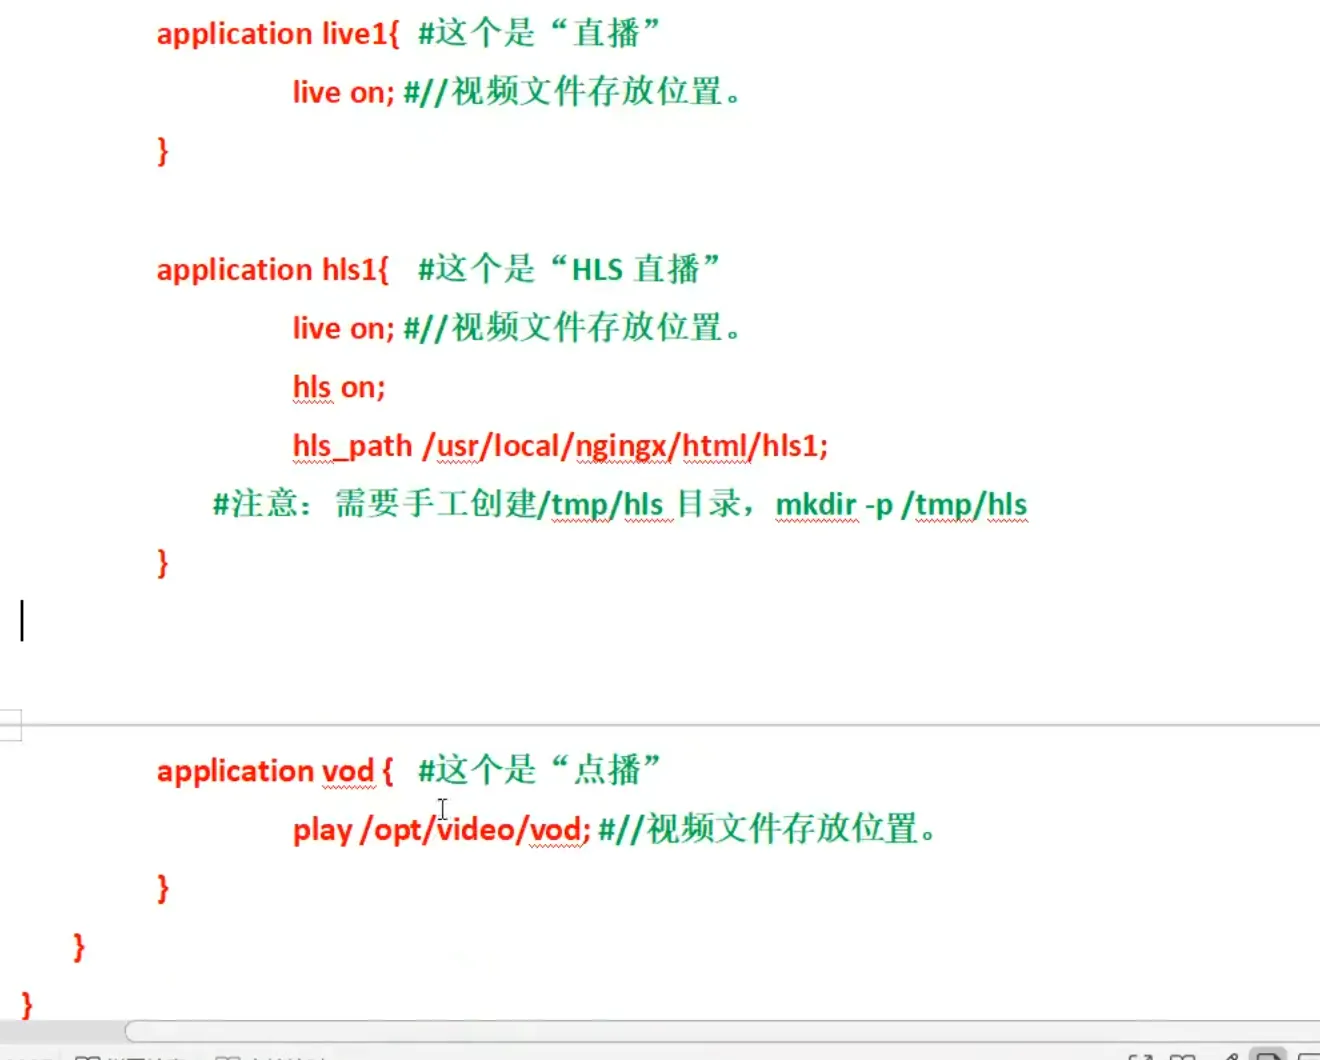
  #  直播推流
	application live{
	    live on;
	}
  # hls 推流
	application hls1{
		live on;
		hls on;
		hls_path  /usr/local/nginx/html/hls1/ ;
	}
  ##  静态资源文件   MP4 格式
	application vod{
		play /usr/local/nginx/html/vod;

	}
  }
}
前端
html
<!DOCTYPE html>
<html>
	<head>
		<meta charset="utf-8">
		<title></title>
		 <link href="https://vjs.zencdn.net/8.10.0/video-js.css" rel="stylesheet" />
		  <script src="https://vjs.zencdn.net/8.10.0/video.min.js"></script>
	</head>
	<body>
		 <video
    id="my-video"
    class="video-js"
    controls
    preload="auto"
    width="640"
    height="264"

    data-setup="{}"
  >
  <!-- http://192.168.83.137/vod/1.mp4 -->
    <source src="http://192.168.83.137/hls1/1.m3u8" />

    <p class="vjs-no-js">
      To view this video please enable JavaScript, and consider upgrading to a
      web browser that
      <a href="https://videojs.com/html5-video-support/" target="_blank"
        >supports HTML5 video</a
      >
    </p>
  </video>


	</body>
</html>
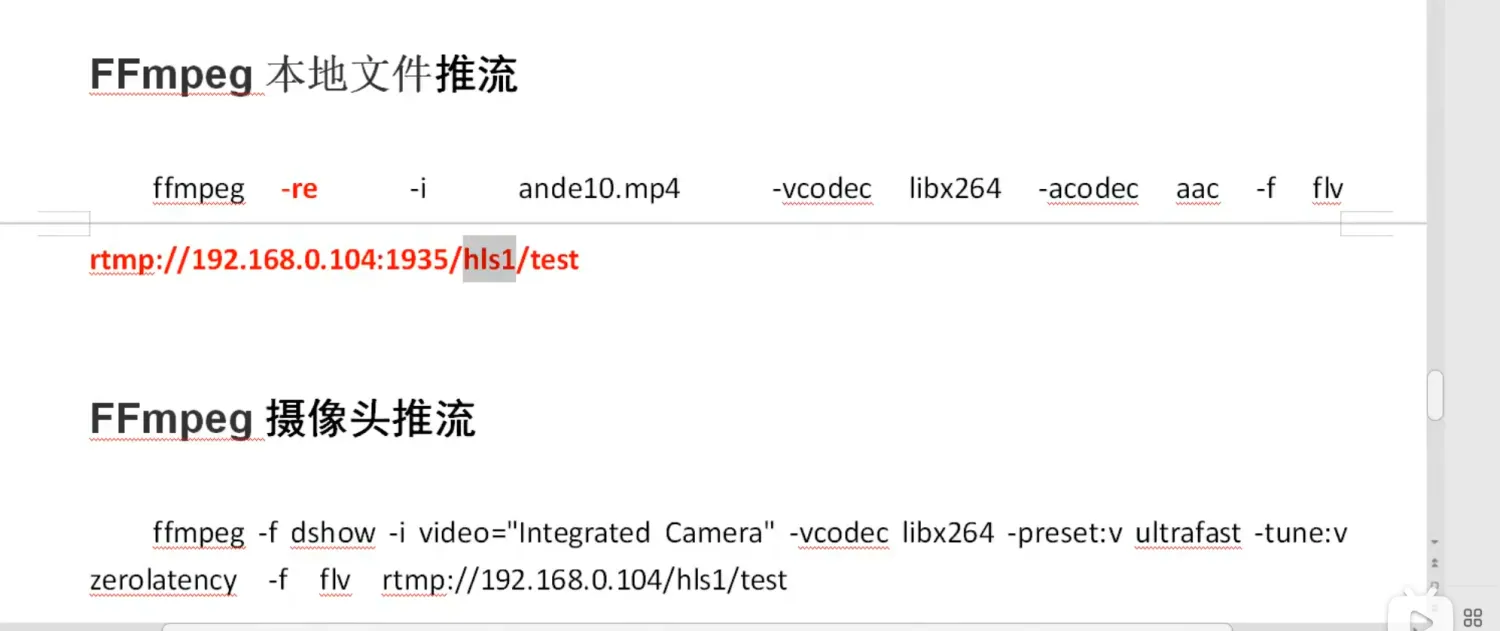
ffmpeg 推流

sh
ffmpeg -re -i 1.mp4 -vcodec libx264 -acodec aac -f flv rtmp://192.168.83.137:1935/hls1/1goaccess 监控 nginx
https://www.goaccess.cc/?mod=man
sh
yum install goaccess
##  输出  监控报告
goaccess -f access.log -o report.html --log-format=COMBINED
## 中文
LANG="zh_CN.UTF-8" goaccess -f access.log --log-format=COMBINED  -o report.html